


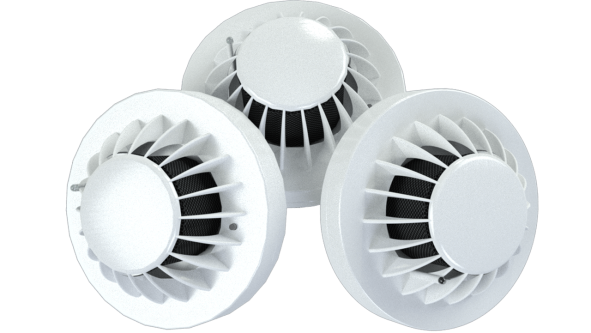
WIRELESS ADDRESSABLE SMOKE/HEAT DETECTOR
FUNCTION
A smoke detector is a device that senses smoke and Heat detector is device that senses heat, typically as an indicator of fire. Commercial security devices issue a signal to a panel's part of a fire alarm system.
INSTALLATION
- Get the mounting plate from the back of the detector by holding the plate and twisting the detector slightly in clockwise direction.
- Secure the mounting plate to the ceiling with the anchors and screws provided.
- This Detector is battery powered and will not function without the use of one of the recommenced batteries. The battery must be in good working condition and installed properly.
RECOMMENDED LOCATIONS
- Smoke and heat, rise to the ceiling and spread horizontally. Mounting the smoke/Heat detector on the ceiling in the center of the room places it closest to all points in the room. Ceiling mounting is preferred in ordinary residential construction.
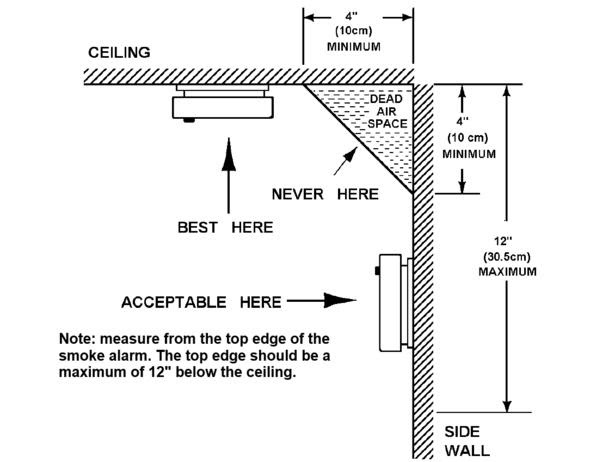
- When mounting a Detector on the ceiling, locate it at a minimum of 4” (10 cm) from the side wall (see Diag. A).
- When mounting the detector on the wall, use an inside wall with the top edge of the detector at a mini-mum of 4” (10 cm) and a maximum of 12” (30.5 cm) below the ceiling. (Refer Diag. A).
- Put smoke detectors at both ends of a bedroom hallway or large room if the hallway or room is more than 30 feet (9.1 m) long.

- Install Smoke/Heat detectors on sloped, peaked or cathedral ceilings at or within 3ft (0.9m) of the highest point (measured horizontally). NFPA states: “Smoke detector in rooms with ceiling slopes greater than 1 foot in 8 feet (.3m in 2.4m) horizontally shall be located on the high side of the room.” NFPA states: “A row of detectors shall be spaced and located within 3 ft. (0.9m) of the peak of the ceiling measured horizontally” (see diagram “B”).
AVOID THESE LOCATIONS
- Near appliances or areas where normal combustion regularly occurs (kitchens, near furnaces, hot water heaters).
- In an area where the temperature may fall below 40ºF or rise above 100ºF.
- In areas with high humidity, like bathrooms or areas near dishwashers or washing machines. Install at least 10 feet away from these areas.
- Near air returns or heating and cooling supply vents. Install at least 3 feet away from these areas. The air could blow smoke away from the detector.
- In extremely dusty, dirty, or insect-infested areas where loose particles interfere with smoke detector operation.
- WARNING: Incorrect orientation will result in decrease in operational effectiveness
OPERATION
- Once installation done, test by pushing the test button on the cover and hold it down for a minimum of 5 seconds. This will send signal and LED on cover will glow, if all the electronics, circuitry, battery are working properly. If the detector LED does not glow and you have already replaced the battery, the detector must be replaced.
- The smoke/Heat detector is functional once a fresh battery is installed and testing is complete. When the smoke detector photoelectric sensor chamber senses products of combustion and Heat Detector senses heat, it will send signal to hooter panel/CMS panel which sounds a loud (110 dB) alarm until the sensing chamber is cleared off smoke particles and heat is subceed determined temperature.
LED INDICATION
- This smoke/Heat detector is equipped with a red LED indicator, which will glow continuously while sending the signal (if you push the test button).
- Standby Condition: The red LED will flash every 5-10 seconds to indicate that the smoke/Heat detector is operating properly.
- Alarm Condition: When the detector senses products of combustion and Heat exceeds determined temperature, goes into alarm, the red LED will flash rapidly. The rapid flashing LED and temporal alarm will continue until the air is cleared and heat is subceed determined temperature.
TESTING
- Test by pushing the test button on the cover and hold it down for a minimum of 2 seconds. This will sound the hooter if the electronic circuitry and horn and battery are working. If no alarm sounds, the unit has defective batteries or other failure.
- TEST THE DETECTOR 3 MONTH TO ENSURE PROPER OPERATION.
- Press the test button, if red lights flash rapidly it insure that detector is in good condition.
MAINTENANCE
- CLEAN THE DETECTOR
- The detector should be cleaned at least once a 3 Month.
- To clean your detector, you can clean the detector by using compressed air or a vacuum cleaner hose with a soft brush attachment. Blow or vacuum around the perimeter of the detector to remove dust and dirt. The outside of the detector can be wiped with a damp cloth (do not use a wet cloth to avoid water entering the unit).
- After cleaning, reinstall your detector and test your detector by using the Test button. If cleaning does not restore the detector to normal operation, the detector should be replaced.
- Do not paint the unit. Paint will seal the vents and interfere with the sensor’s ability to detect smoke. Never attempt to disassemble the unit or clean inside. This action will void your warranty.
BATTERY REPLACEMENT
- Turn smoke/Heat detector Anticlockwise to Remove from the Mounting plate.
- Gently pull down smoke detector.
- Remove battery from the compartment.
- Insert a new 9 volt battery to connector. NOTE POLARITY OF CONNECTIONS.
- Note: Use only the batteries recommended below. Use of different batteries than the recommended ones, may have a detrimental effect on the smoke/Heat detector.
- Alkaline type: 9V After installing or changing the battery, reinstall your detector. Test your detector by using the test button.